Authentication
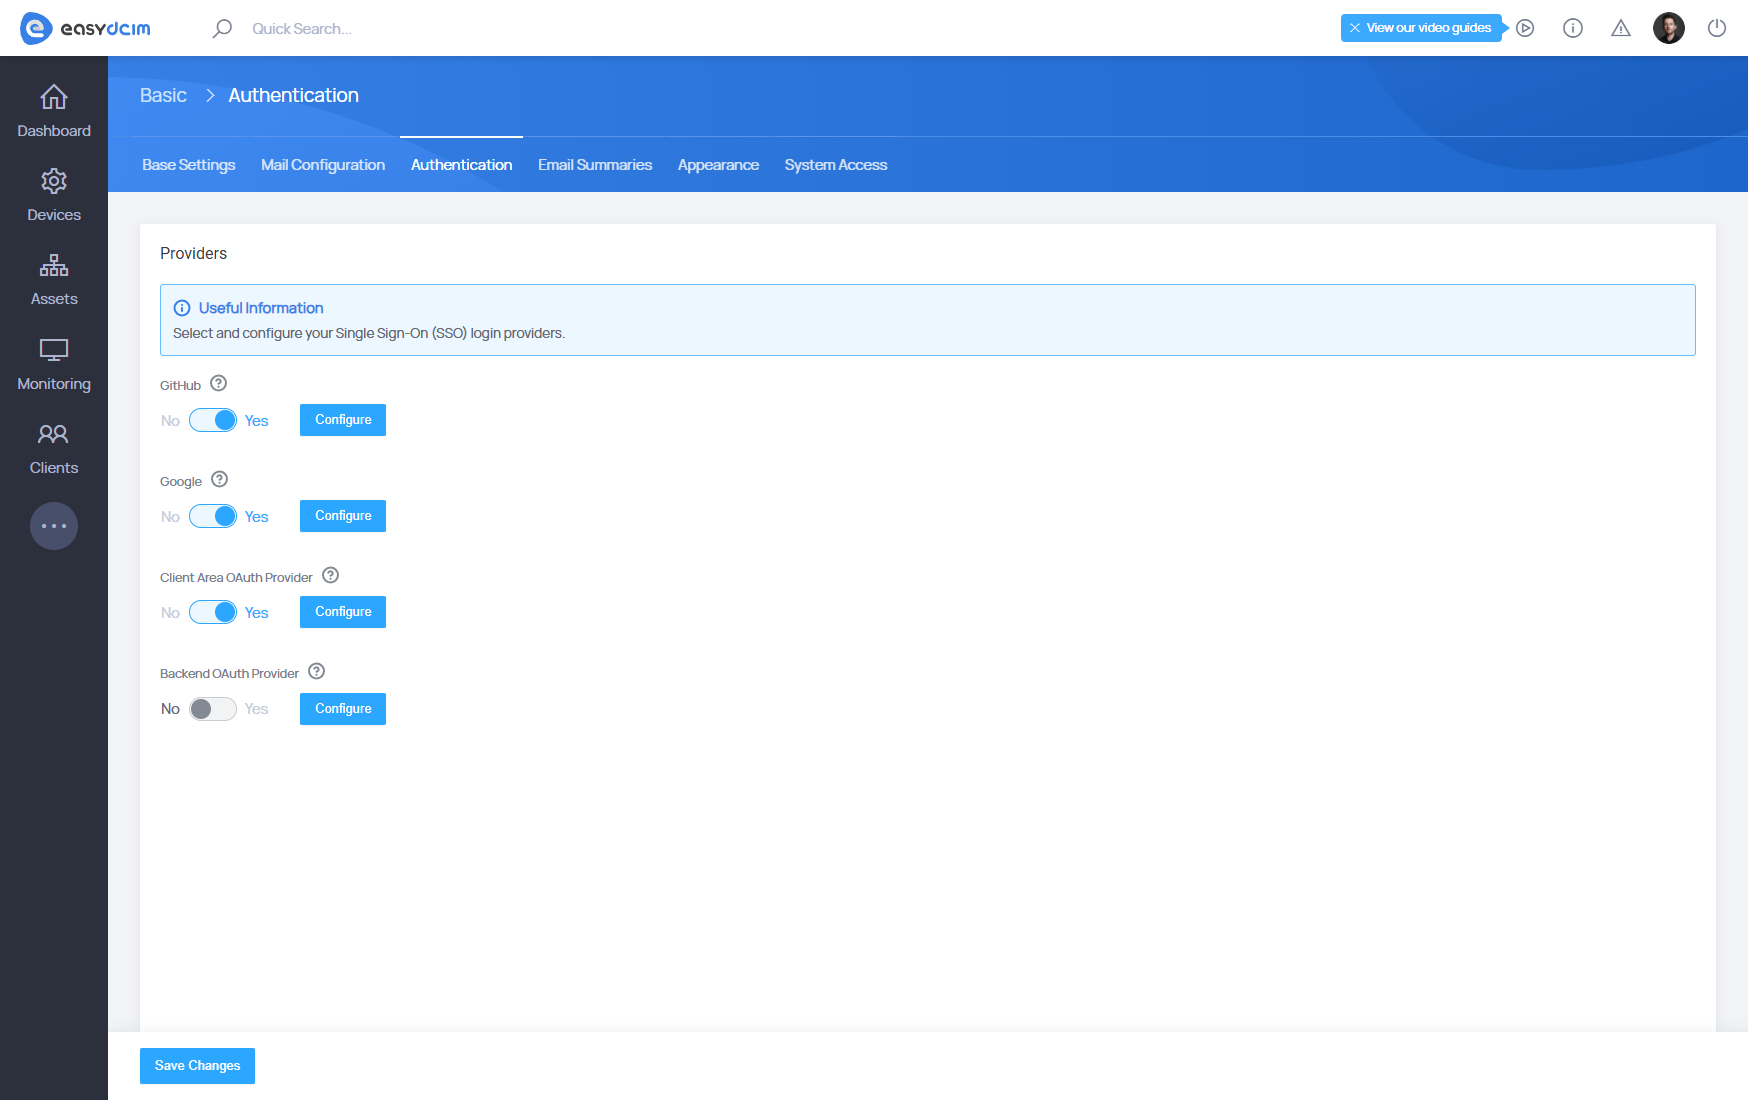
EasyDCIM supports single sign-on (SSO) with OAuth 2.0 identity providers such as GitHub, Google and custom OAuth providers. This integration enables the use of an OAuth 2.0 provider to authenticate EasyDCIM administrators and clients.
Once OAuth 2.0 SSO is enabled, EasyDCIM users can simply log into EasyDCIM using their GitHub, Google, or a custom provider’s email address.

Requirements
In order to successfully configure SSO, the following requirements must be met:
- Each EasyDCIM user must be registered in the EasyDCIM panel with their unique email address.
- The same email address as the EasyDCIM user’s must also be used for authentication with the OAuth 2.0 provider that will be enabled in EasyDCIM for SSO.
For example, if an EasyDCIM user is registered in EasyDCIM with the email address [email protected], and OAuth SSO is enabled in EasyDCIM with GitHub as the provider, the user must also be registered in GitHub with the same email address, [email protected].
GitHub
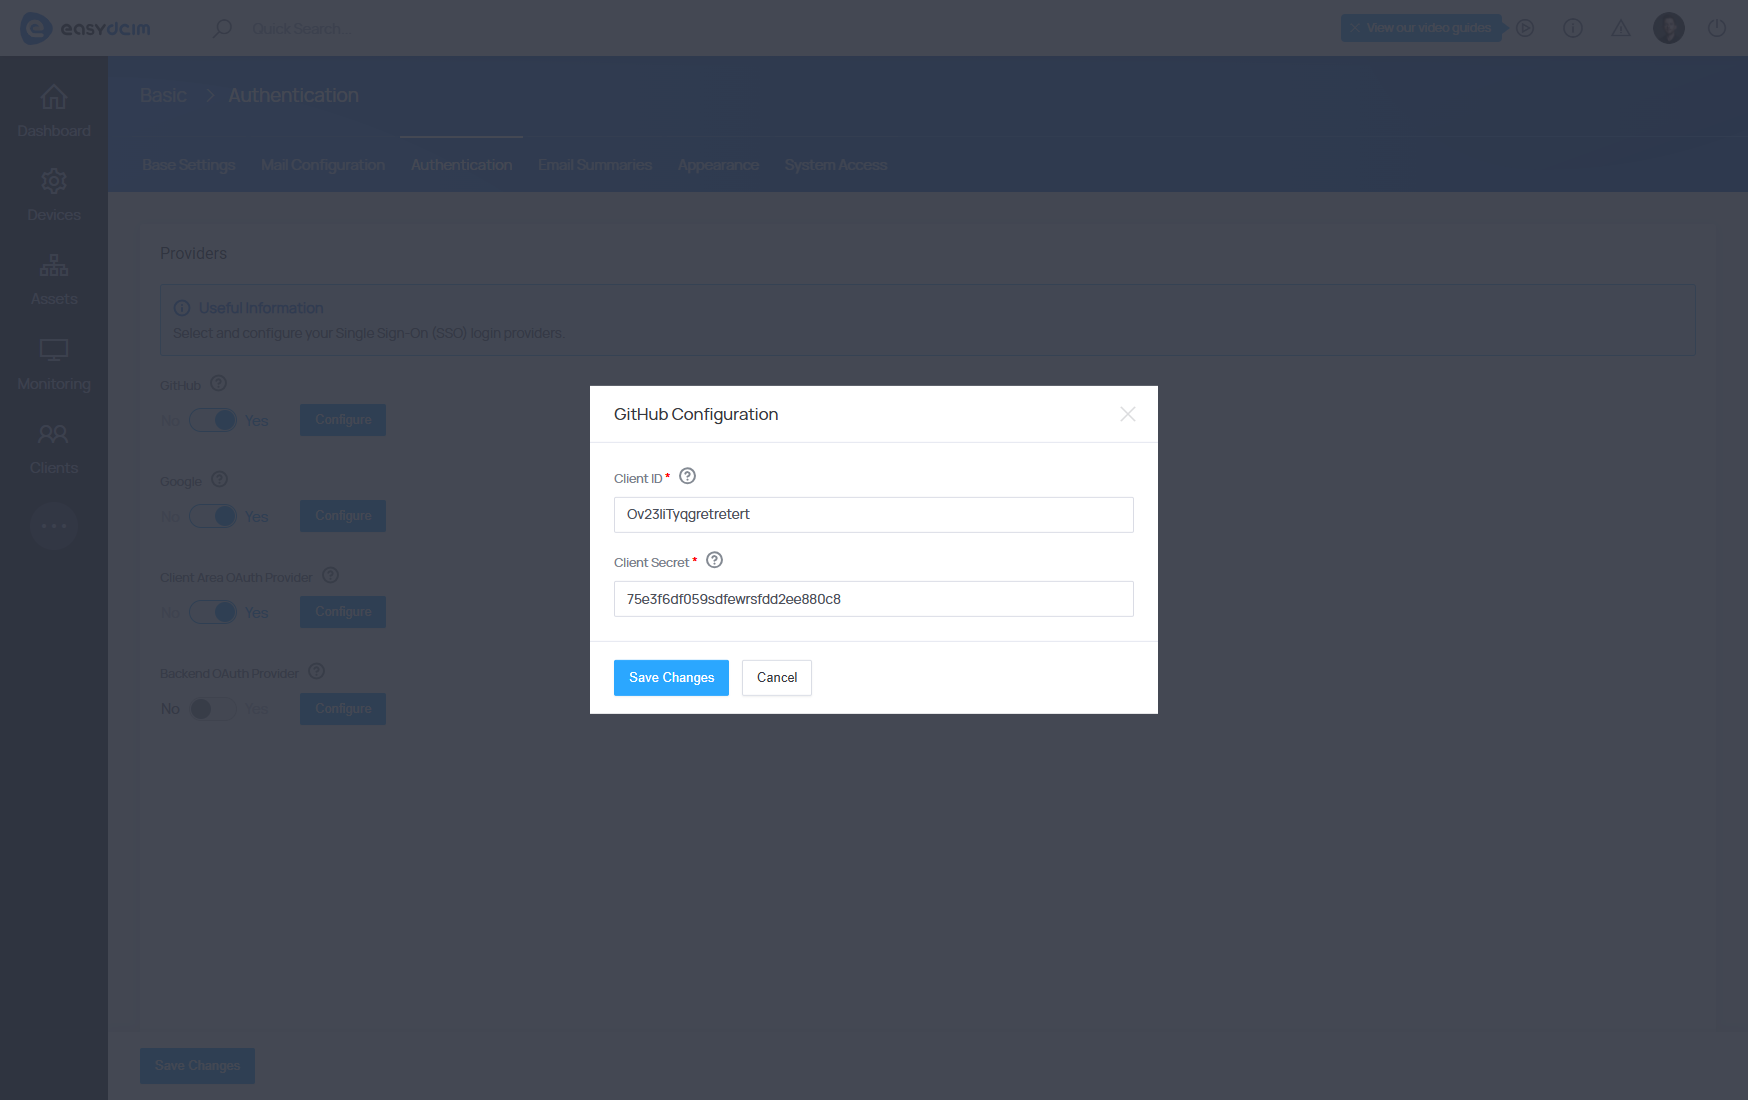
The GitHub integration works in both the client and admin areas. Detailed instructions for creating an OAuth application can be found in the official GitHub documentation: Creating an OAuth app
Data required for creating a GitHub application:
- Homepage URL - the main EasyDCIM address, for example: https://EASYDCIM_DOMAIN
- Authorization callback URL - the callback URL: https://EASYDCIM_DOMAIN/oauth/github/callback
After creating an OAuth application, you will receive access credentials such as Client ID and Client Secret, which must be entered in the SSO configuration in EasyDCIM.

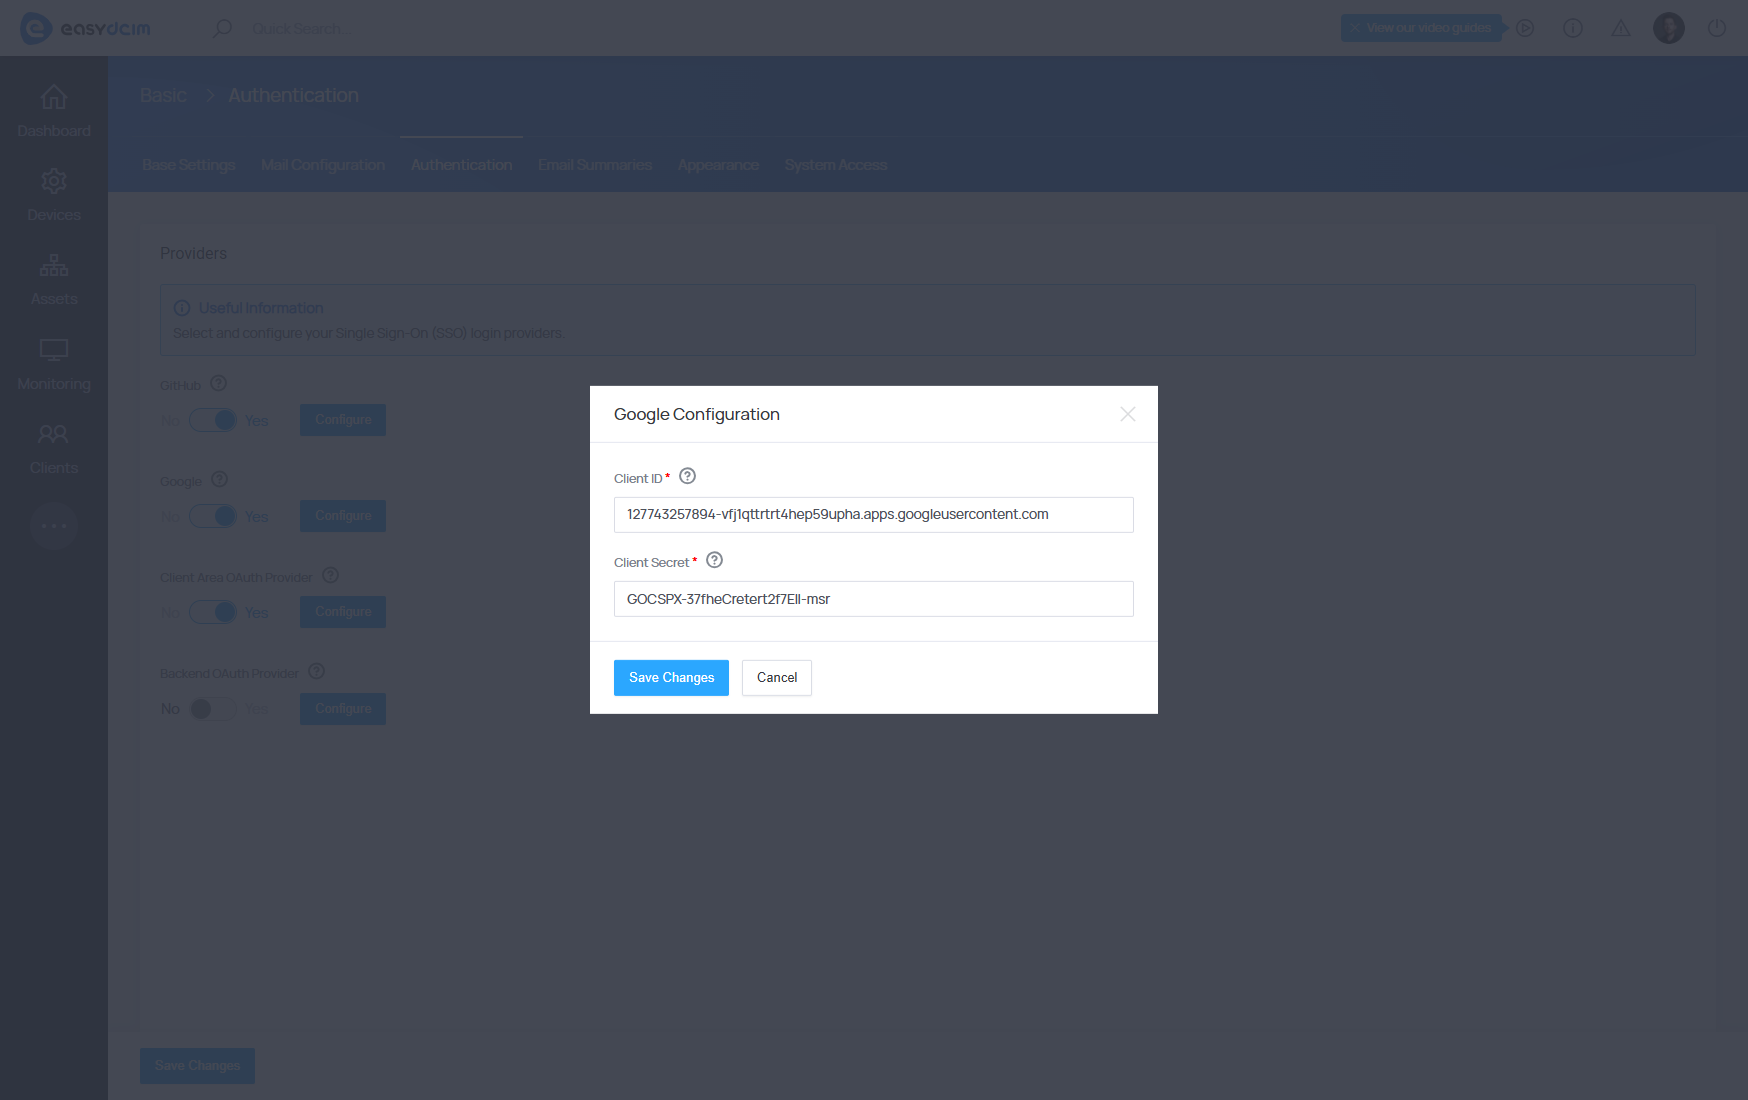
The Google integration works in both the client and admin areas. Detailed instructions for creating an OAuth application can be found in the official Google documentation: Setting up OAuth 2.0
Data required for creating a Google application:
- Authorization callback URL - The callback URL: https://EASYDCIM_DOMAIN/oauth/google/callback
After creating an OAuth application, you will receive access credentials such as Client ID and Client Secret, which must be entered in the SSO configuration in EasyDCIM.

Custom OAuth Provider
It is also possible to integrate a custom OAuth authorization provider. This integration requires a separate configuration for the provider in both the client and admin areas. This approach ensures greater flexibility and security in your data center. An example of an identity and access management solution is the popular Keycloak system.
Data required for creating a custom OAuth application:
- Client Area authorization callback URL - The callback URL for the client area: https://EASYDCIM_DOMAIN/oauth/provider/clientarea/callback
- Backend authorization callback URL - The callback URL for the admin area: https://EASYDCIM_DOMAIN/oauth/provider/backend/callback
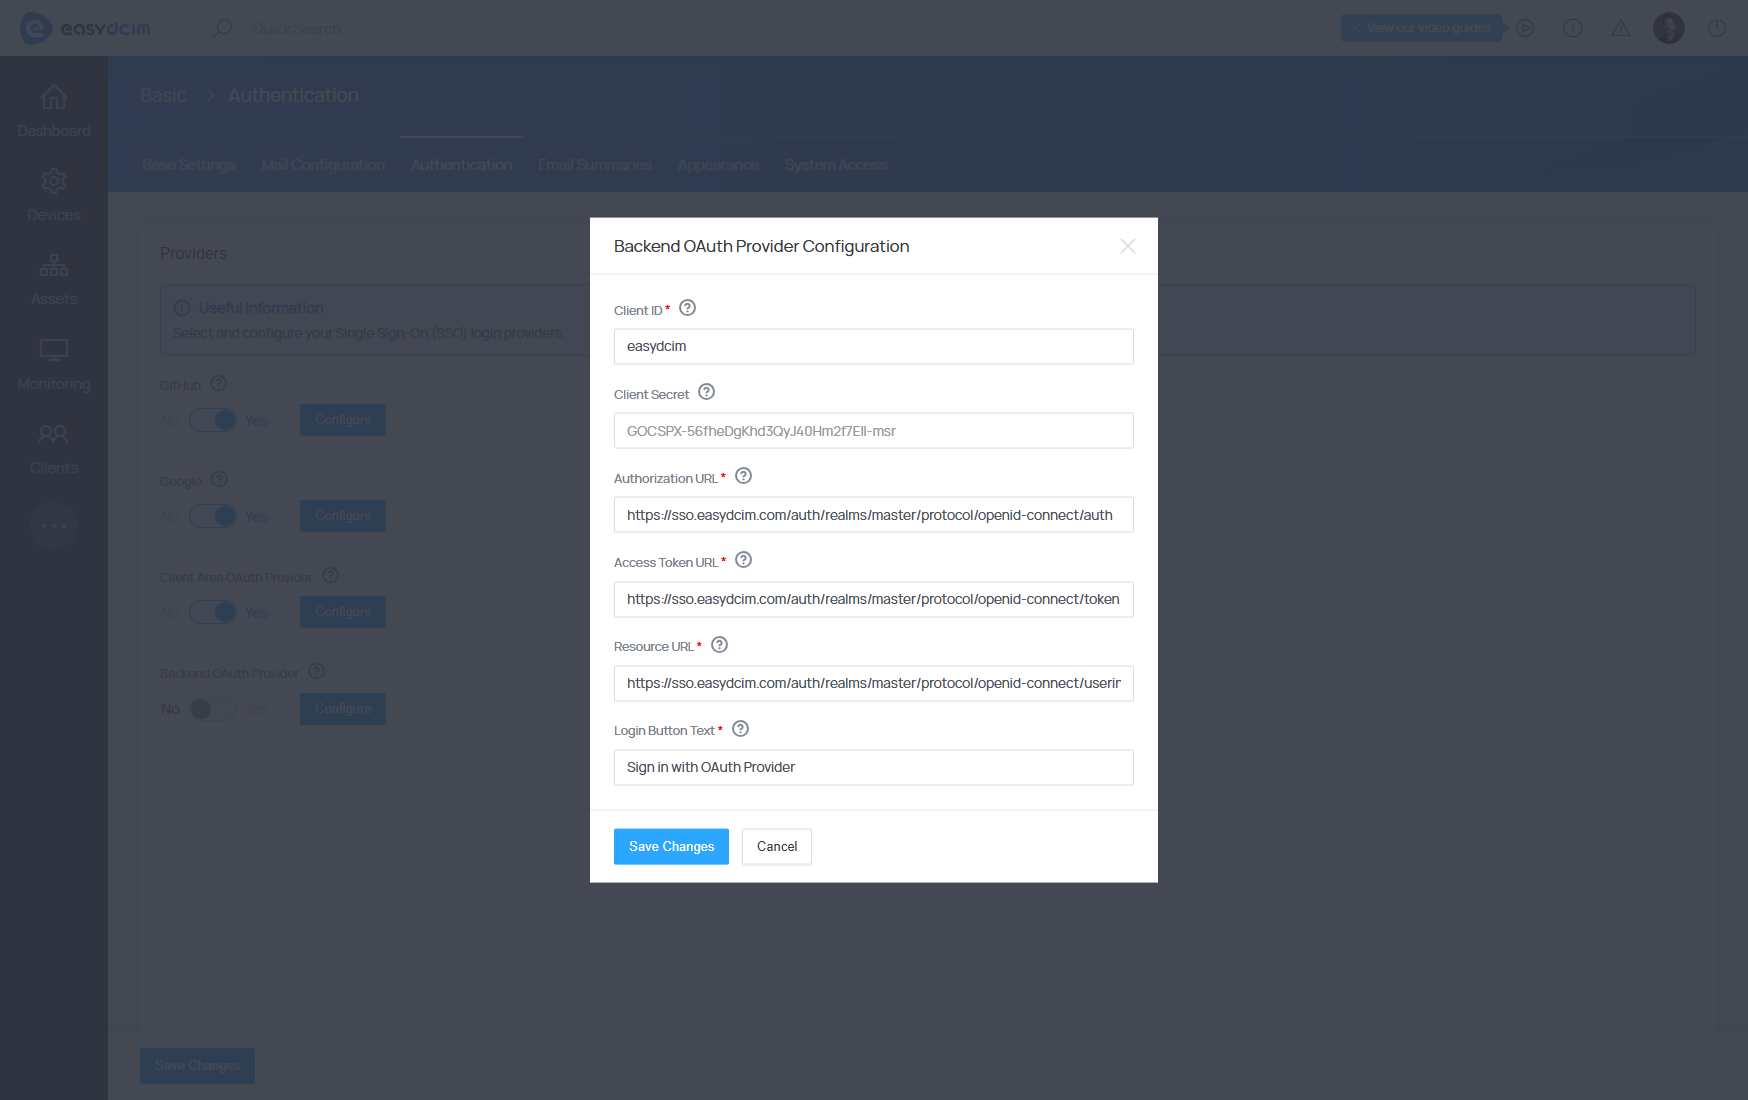
The provider’s configuration is based on standard access data for a given authorization server:
- Client ID - Enter the public ID of the OAuth application.
- Client Secret - Enter the access token for the OAuth application.
- Authorization URL - Enter the URL used for authentication with the OAuth provider (redirects users to the OAuth provider’s login screen).
- Access Token URL - Enter the URL used to exchange a valid OAuth authentication code for an access token.
- Resource URL - Enter the URL used by EasyDCIM to retrieve information about authenticated users.
- Login Button Text - Enter the text to be displayed on the login button.


